Homemade Peanut Butter Cups with Maple Filling
Highlighted under: Golden Recipes
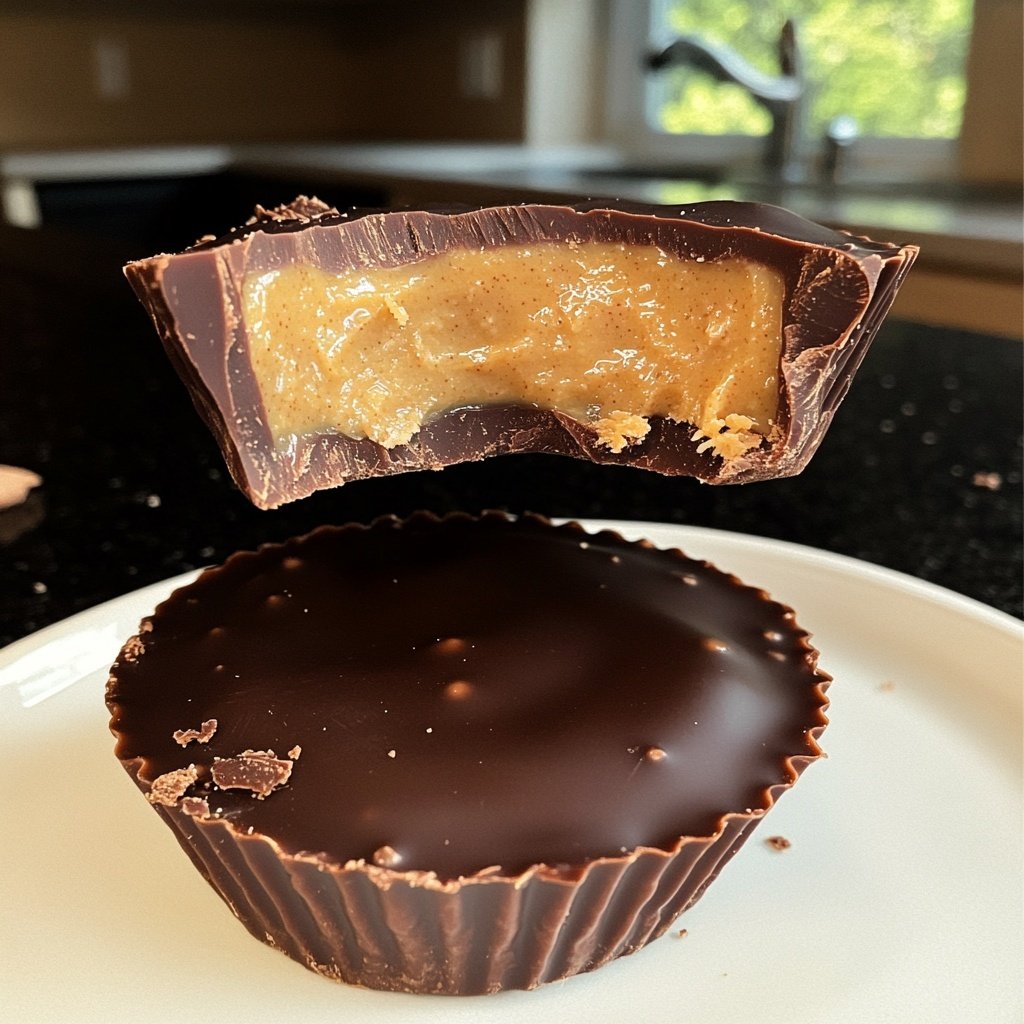
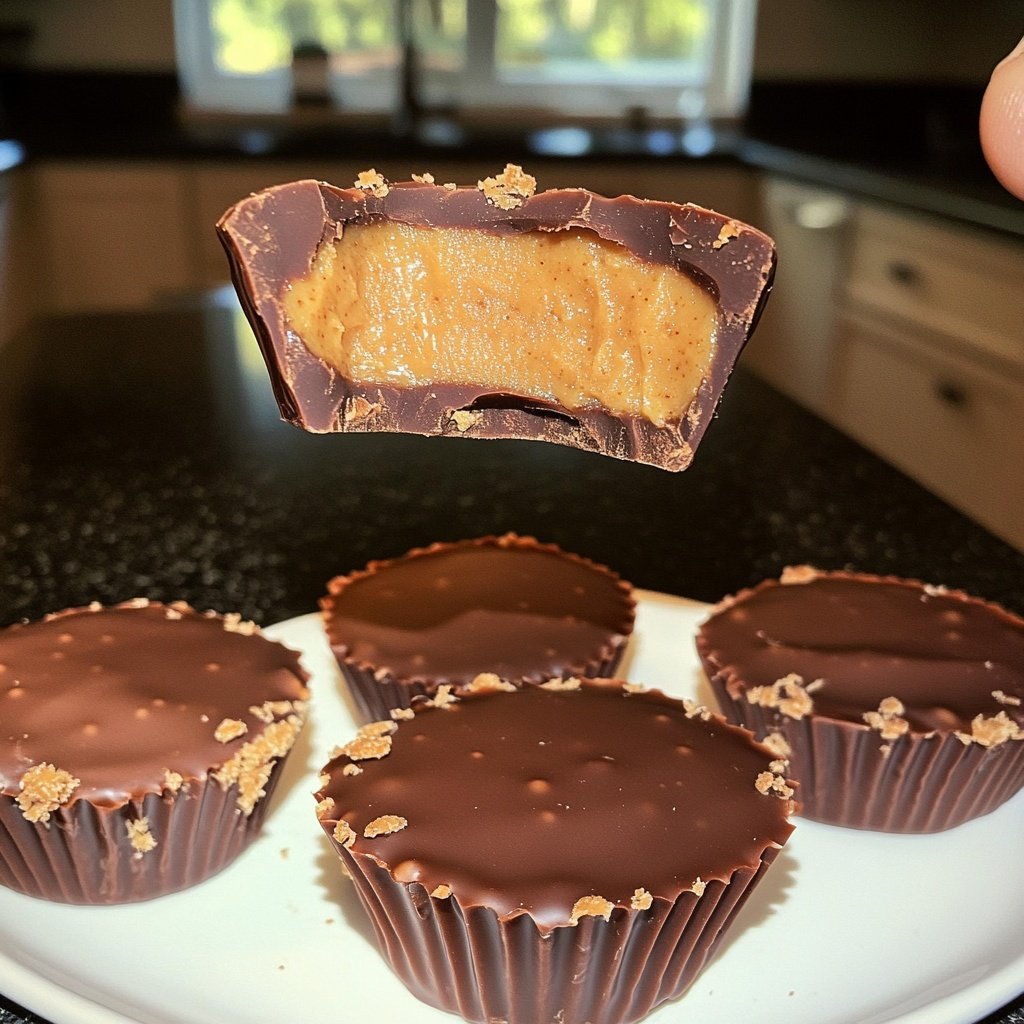
I always loved the combination of peanut butter and chocolate, but adding a touch of maple syrup takes it to a whole new level! Making these Homemade Peanut Butter Cups at home is easier than it sounds, and the flavor is simply irresistible. With a smooth texture, these little treats melt in your mouth while offering a delightful sweetness from the maple filling. Whether it’s for a special occasion or just a sweet snack, these cups will surely impress anyone who tries them.
When I first decided to create my own peanut butter cups, I experimented with different fillings. After several tries, I discovered that adding pure maple syrup to the peanut butter makes a world of difference. The sweetness complements the salty taste of the peanut butter perfectly, and it’s a unique twist I think everyone should try.
During one of my baking sessions, I ran out of classic chocolate and used dark chocolate instead. The result was a richer flavor that paired beautifully with the maple filling. Don't hesitate to experiment with different kinds of chocolate to find your ideal balance!
Why You'll Love This Recipe
- Unique maple filling that elevates classic peanut butter cups.
- Rich chocolate coating that adds depth to every bite.
- Easy to make at home for satisfying sweet cravings.
Understanding the Ingredients
The key to delicious Homemade Peanut Butter Cups lies in the quality of the ingredients used, especially the peanut butter. For the best flavor and texture, opt for a high-quality, creamy peanut butter without added sugars or preservatives. Natural peanut butter tends to have a richer flavor profile, which beautifully complements the maple syrup. The maple syrup not only sweetens the filling but also adds a unique depth that elevates every bite. While you can use store-bought peanut butter, I recommend trying an organic version for the best results.
The chocolate coating is another crucial element. Dark chocolate provides a robust contrast to the sweet filling, creating a balanced treat. You can choose milk chocolate if you prefer a sweeter experience, but keep in mind that darker chocolate enhances the overall richness. Add a tablespoon of coconut oil to your chocolate to ensure a glossy finish and make it easier to coat your cups evenly. If you’re looking for a dairy-free option, consider using vegan chocolate chips instead.
Mastering the Technique
When melting the chocolate, it’s essential to do so slowly to avoid overheating. Use a microwave-safe bowl and set the microwave to 50% power, heating in 30-second increments while stirring in between. This method helps prevent the chocolate from seizing. Ideally, you want the chocolate to be fully melted and glossy, with no lumps remaining. Another great option is to use a double boiler on the stove—this allows for precise control over the heat, making it harder to burn the chocolate.
As you assemble the cups, pay close attention to the layering process. The initial layer of chocolate should be thick enough to create a sturdy base but not so thick that it overshadows the filling. After chilling, ensure the peanut butter mixture is firm enough to hold its shape when you add the final layer of chocolate. If the filling is too soft, it might blend with the chocolate, ruining the layers. A few minutes in the refrigerator can help firm it up before assembly.
Ingredients
Peanut Butter Filling
- 1 cup creamy peanut butter
- 1/4 cup pure maple syrup
- 1/2 teaspoon vanilla extract
- 1/4 teaspoon salt
Chocolate Coating
- 2 cups dark or milk chocolate chips
- 1 tablespoon coconut oil
Instructions
Steps
Prepare the Peanut Butter Filling
In a mixing bowl, combine the peanut butter, maple syrup, vanilla extract, and salt. Mix until smooth and well combined. Chill in the refrigerator for about 15 minutes.
Melt the Chocolate
In a microwave-safe bowl, combine the chocolate chips and coconut oil. Heat in the microwave in 30-second intervals, stirring between each, until fully melted and smooth.
Assemble the Cups
Line a muffin tin with cupcake liners. Pour a small amount of melted chocolate into each liner, enough to cover the bottom. Place in the freezer for 5 minutes to set. Once set, add a spoonful of the peanut butter filling on top, followed by more chocolate to cover completely.
Chill and Serve
Return the muffin tin to the freezer for another 15 minutes, or until set. Carefully remove the cups from the liners, serve, and enjoy your homemade treats!
Enjoy!
Pro Tips
- Feel free to experiment with different nut butters or add toppings like sea salt or crushed nuts for extra texture.
Storage Tips
These Homemade Peanut Butter Cups can be stored in an airtight container in the refrigerator for up to two weeks. For longer storage, consider freezing them. Simply place the cups in a single layer on a baking sheet until they are solid, then transfer them to a freezer-safe container. They will keep well for up to three months. When you're ready to enjoy, allow them to thaw in the refrigerator for a few hours for the best texture.
If you notice the filling is a bit too soft upon refrigeration, it may be beneficial to slightly refrigerate the filled cups before the final chocolate layer. The chilling time allows the peanut butter filling to firm up, aiding in the layering process and ensuring a clean separation between the chocolate and filling when enjoyed.
Serving Suggestions
These peanut butter cups are delightful on their own, but you can elevate them even further by serving them with a side of fresh fruit or a dollop of whipped cream. A sprinkle of sea salt on top after the final chocolate layer can enhance the flavor, cutting through the sweetness and providing an unexpected twist.
For a fun variation, try adding different flavors to your peanut butter filling, such as a dash of cinnamon or a splash of espresso for a mocha-inspired treat. You might also consider incorporating crushed nuts or a swirl of caramel for added texture and complexity in flavor.
Questions About Recipes
→ Can I use natural peanut butter?
Yes, but natural peanut butter tends to be more oily, so you may need to adjust the amount of maple syrup.
→ How should I store these peanut butter cups?
Store them in an airtight container in the refrigerator for up to 2 weeks.
→ Can these be made vegan?
Absolutely! Just use dairy-free chocolate chips and ensure the maple syrup is 100% pure.
→ What other flavors can I add to the filling?
You can add powdered sugar for sweetness or mix in spices like cinnamon for a fun twist.
Homemade Peanut Butter Cups with Maple Filling
Created by: Quincy Harper
Recipe Type: Golden Recipes
Skill Level: Intermediate
Final Quantity: 12 cups
What You'll Need
Peanut Butter Filling
- 1 cup creamy peanut butter
- 1/4 cup pure maple syrup
- 1/2 teaspoon vanilla extract
- 1/4 teaspoon salt
Chocolate Coating
- 2 cups dark or milk chocolate chips
- 1 tablespoon coconut oil
How-To Steps
In a mixing bowl, combine the peanut butter, maple syrup, vanilla extract, and salt. Mix until smooth and well combined. Chill in the refrigerator for about 15 minutes.
In a microwave-safe bowl, combine the chocolate chips and coconut oil. Heat in the microwave in 30-second intervals, stirring between each, until fully melted and smooth.
Line a muffin tin with cupcake liners. Pour a small amount of melted chocolate into each liner, enough to cover the bottom. Place in the freezer for 5 minutes to set. Once set, add a spoonful of the peanut butter filling on top, followed by more chocolate to cover completely.
Return the muffin tin to the freezer for another 15 minutes, or until set. Carefully remove the cups from the liners, serve, and enjoy your homemade treats!
Extra Tips
- Feel free to experiment with different nut butters or add toppings like sea salt or crushed nuts for extra texture.
Nutritional Breakdown (Per Serving)
- Calories: 250 kcal
- Total Fat: 18g
- Saturated Fat: 7g
- Cholesterol: 0mg
- Sodium: 130mg
- Total Carbohydrates: 20g
- Dietary Fiber: 2g
- Sugars: 10g
- Protein: 6g